Hello and welcome to another of my walk through card guides / tutorials .


This card making tutorial will take you through how to make and decorate your own handmade explosion card / pop out diamond card.
Two of the cards above are made using one sheet of A4 card and two were made using one sheet of A3 card, I will talk through the A4 ones and just give measurements for the A3 as the process is exactly the same but a little simpler with A3.
To begin with I took a piece A4 gold card and trimmed in down to 294mm in length (landscape), then with the card still landscape measured 98mm in from both the top and the bottom of the card and marked it with a pencil line. For A3 you do not need to trim the card first and the measurements to mark would be 14cm.
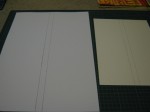
Next you cut the card along both of the lines you have drawn so that you are left with two long thin pieces of card 98mm tall (14cm for A3). Then measure along the length 49mm in from each side and 98mm from each side (for A3 7cm from each side and 14cm from each side) scoring a line from top to bottom at these measurements. After that after that measure and make a mark with a pencil at the top and bottom of the centre of the card (147mm for A4 or 21cm for A3) DO NOT score a line between these two marks. Take your ruler and line up the mark in the centre of the top of the card and the line at the bottom of the 49mm score line in from left (7cm for A3) and score a diagonal line between the two. Then line up the mark in the center at the bottom with the with the top of the score line 49mm in from the left and score another diagonal line. Once thats done repeat the process from the center to the score line 49mm in from the right. The picture below shows the template i made for the A4 version with the lines drawn in pencil so that you can see them clearly on the blog.
Once all of the score lines are in place I always fold each line backwards and forwards a few times to make sure they will fold well, after doing that if you want the diamond to come forward like the red and gold card you need to push the score lines that are 98mm (14cm for A3) from the edge (the one between the triangle shapes your score lines have made) so that the triangles sit behind the the diamond shape. If you want the diamond to be at the back you need to pull those same score lines forward.
To decorate i used papers from a 6 inch by 6 inch pad (1 sheet for A4 2 sheets for A3) I marked out two retangles on the papers 90mm x 40mm (6.5cm x 9cm for A3) Then I marked out two squares 60mm x 60mm (8cm x 8cm or 9cm x 9cm for A3 depending on your personal preference) for the red and gold A4 card I split one square from one corner to the other and for the others I split one of the squares in to 4 diagonally from corner to corner. You may also notice that for the green and gold card i cut the retangle pieces down for a different effect (this was a happy accident as i didnt check which way round my paper was before i drew and cut my retangles)
When all your pieces are cut out stick them to the appropriate sections of your card and then embelish. For the red and gold card I used an embossing folder on the paper before sticking down and used PanPastel (which is great more news to come on that soon) to colour the embossed areas of the paper ( PanPastel can be bought from http://www.yourcreativitystore.com/categories/PanPastel/ and the challenge blog for pan pastel will be starting challenges very soon) then i used a metal charm to finish it off. For the other A4 card i used a couple of chipboard embellishments edge with a gold pigment ink pad. For the poppy card i stamped my greeting in red pigment ink and attached chipboard tags on ribbon using butterfly brads. Last but not least for the bunny card i stamped my image on to white super smooth card and coloured it in using promarkers, then cut it out using nestabilities dies and layers on to pink glitter card repeating the process using the same die for the greeting and then embellished with foam glitter flowers.
Thank you for reading my card making tutorial I hope you liked it and that you have fun making your own handmade homemade cards using the step by step instructions =)
I love dimensional cards. Your designs are great! ~Sophia
Thank you Sophia =)